
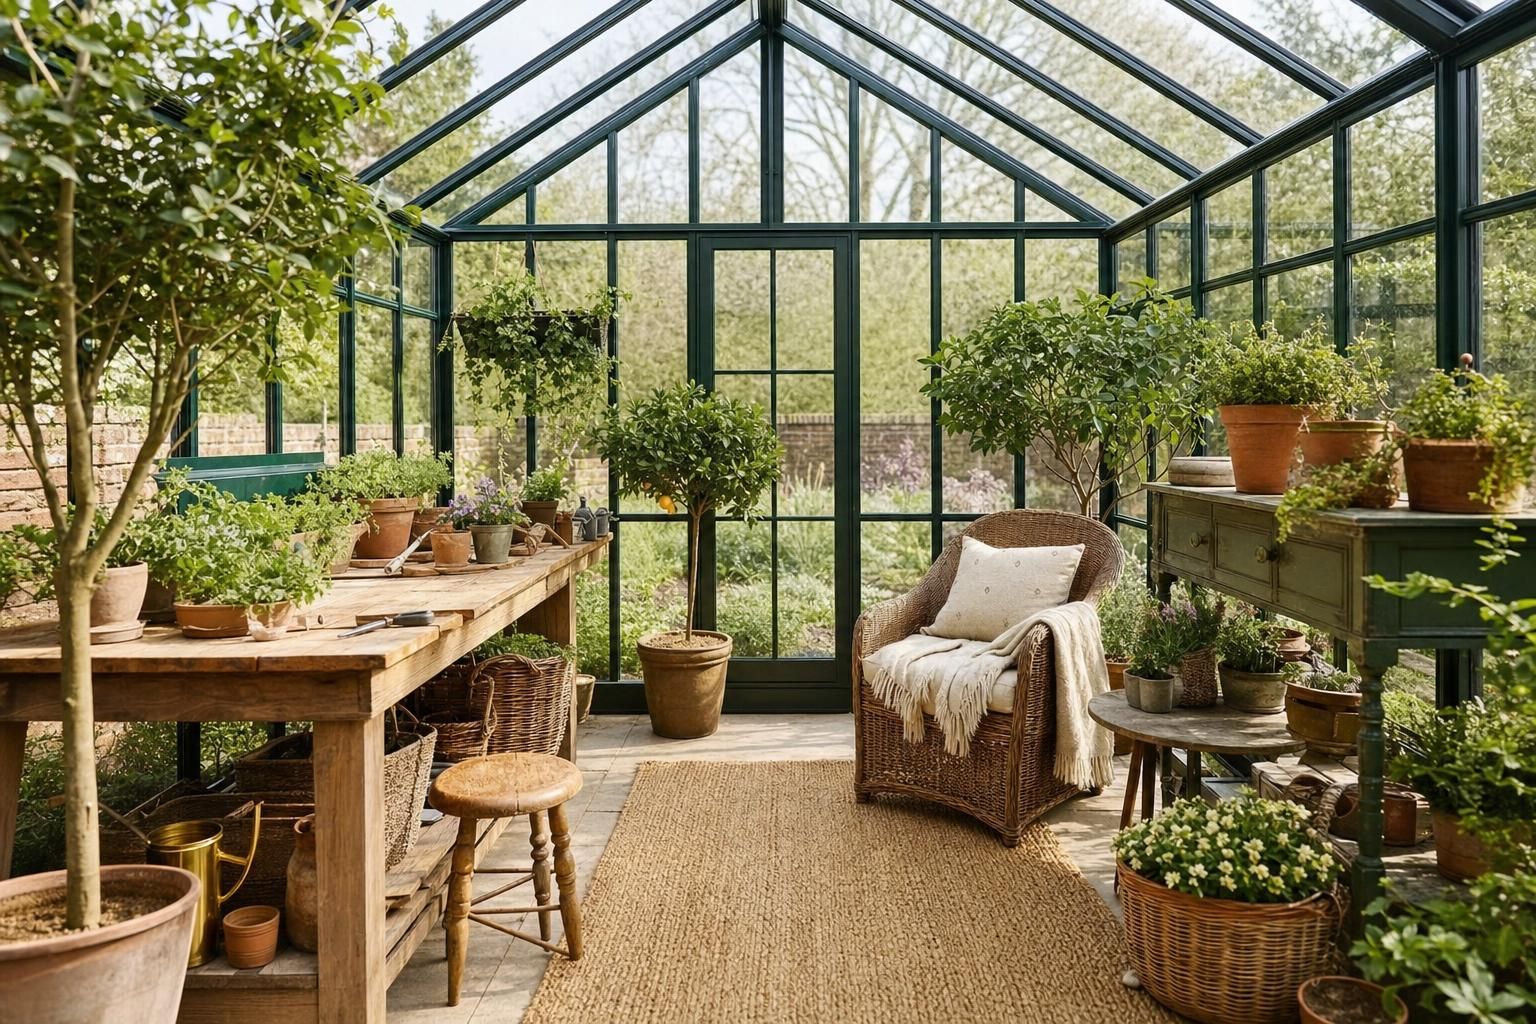
Greenhouse Interior Ideas
Well planned greenhouse interior ideas can turn a basic growing structure into a productive, comfortable and attractive part of the garden. Whether you use your greenhouse for raising vegetables, keeping tender plants through winter, growing cut flowers or enjoying a quiet seat among the pots, the layout needs to work with the building rather than against it.
In practice, the best greenhouse interiors are built around three things, light, airflow and access. A greenhouse that looks tidy on day one can quickly become difficult to use if staging is too deep, paths are too narrow or watering points have been overlooked. Planning the interior before buying shelves, benches and containers avoids wasted money and makes daily gardening much easier.
For UK homes, practical details matter. Our lower winter light levels, damp weather, cold snaps and fluctuating spring temperatures place different demands on a greenhouse than a purely decorative garden room. Materials need to cope with humidity, shelving needs to carry real weight, and electrical work must be installed safely.
Start with the purpose of your greenhouse
Before choosing staging, pots or décor, decide what the greenhouse must do during each season. A small 6 foot by 4 foot greenhouse used for seed sowing needs a very different layout from an 8 foot by 12 foot structure intended for tomatoes, citrus trees and a chair.
Many homeowners try to make every area perform every task. This usually leads to crowded benches, poor ventilation and plants blocking the doorway. A better approach is to allocate zones.
- Propagation zone: A bench near power, with a heated propagator, seed trays, labels and a clean worktop.
- Growing zone: Full height space for tomatoes, cucumbers, peppers, aubergines and climbing plants.
- Potting zone: A durable work surface with compost storage below and hand tools close by.
- Overwintering zone: Shelves or floor space for pelargoniums, fuchsias, citrus and other tender plants.
- Relaxing zone: A compact chair or bench positioned where it does not block the main route or reduce ventilation.
A greenhouse can evolve through the year. In February and March, most of the staging may be needed for seed trays. By June, tall crops need headroom and the benches can hold herbs, chillies and smaller pots. In autumn, the same space may become storage for tender plants. Flexible, removable shelving is usually more useful than fixed furniture in a compact greenhouse.
Greenhouse interior ideas that improve growing space
Use staging along one or both long sides
Staging is the backbone of most greenhouse interiors. Standard aluminium staging is affordable, light and durable, but its open slatted surfaces can allow compost and small pots to drop through. Timber staging looks warmer and can be easier to customise, although untreated softwood will deteriorate quickly in a humid greenhouse.
For a typical 6 foot by 8 foot greenhouse, a common arrangement is one 450mm deep bench along one side, with a narrower 250mm to 300mm shelf on the other. This leaves a usable central path of around 600mm to 700mm. If you want wheelchair access or need room for a trolley, allow a wider route where possible.
Budget around £80 to £180 for basic aluminium staging in a small greenhouse. Heavier duty powder coated steel or cedar benches can cost £200 to £500 or more. A local carpenter can build bespoke treated timber staging for around £250 to £700, depending on size, timber species and whether waterproof shelves, drawers or a potting surface are included.
Do not assume lightweight greenhouse framing will support shelves. Freestanding staging is safer unless the manufacturer confirms the frame can take additional loading. Soil, terracotta pots and wet compost are heavier than they appear. A 30 litre bag of compost weighs roughly 10kg to 15kg when damp, and a full shelf can quickly impose substantial load.
Add high level shelving for light items only
High level shelves make use of the warmer air near the roof and are useful for seed trays, drying onions, storing empty pots and holding lightweight propagation equipment. They should not carry heavy planters, water containers or ceramic pots.
Fit shelves below the lowest roof vent opening and away from opening louvres. Blocking vents is a common cause of fungal problems and heat stress. Keep shelf contents set back from the glazing by at least 50mm where possible, especially in summer, as leaves touching hot glass can scorch.
For inspiration on using vertical planting and layered displays beyond the greenhouse, see Indoor Plant Shelf Ideas for Homes That Add Height Texture and Natural Light.
Create a proper potting bench
A dedicated potting bench prevents compost spreading across every available surface. A working height of around 850mm to 950mm suits many adults, although taller gardeners may prefer 1 metre. The bench should be deep enough for a compost tray and potting up, typically 500mm to 600mm.
A galvanised tray, old Belfast sink or plastic mixing tub placed into the worktop makes cleanup far easier. Below the bench, use lidded storage tubs for compost, perlite, bark and fertiliser. Leaving open bags on the floor attracts slugs and makes it harder to sweep up.
Marine plywood, exterior grade timber and galvanised steel are sensible choices. MDF, chipboard and untreated indoor furniture generally fail within a few seasons because greenhouse condensation causes swelling, mould and delamination.
Make room for tall crops
Tomatoes, cucumbers, cordon fruit and climbing beans need vertical clearance. In many standard greenhouses, the ridge height may be between 1.9 metres and 2.4 metres. Keep the central area clear so plants can be trained upwards from grow bags, raised beds or large containers.
Fit crop bars, plant hooks or support wires only to structural points approved by the greenhouse manufacturer. Tomato plants can become surprisingly heavy in full crop. Avoid drilling into glazing bars without checking the manufacturer guidance, as this can weaken the frame, create leaks or affect a warranty.
A simple floor bed can work well for tomatoes, but it needs a barrier between the garden soil and greenhouse crop area if the ground is prone to pests or disease. Many growers use grow bags or 20 litre to 30 litre pots instead, allowing compost to be replaced each season and reducing the risk of soil borne disease.
Choose flooring that is safe, clean and drains properly
Flooring has a major impact on how pleasant a greenhouse is to use. It needs to tolerate water, dropped pots, mud and regular sweeping. The wrong surface can become slippery or allow weeds to grow through within a year.
| Flooring option | Typical installed UK cost | Benefits | Watch for |
|---|---|---|---|
| Compacted gravel over membrane | £25 to £55 per square metre | Good drainage, economical, easy to refresh | Hard to roll trolleys over, loose stones collect compost |
| Concrete slab | £90 to £150 per square metre | Stable, durable, ideal for heavy staging | Needs falls and drainage planning, can feel cold |
| Paving slabs | £70 to £140 per square metre | Easy to clean, attractive, suitable for paths | Joints can move if base preparation is poor |
| Brick path with gravel sides | £65 to £130 per square metre | Traditional appearance, practical central route | More labour intensive and needs a firm sub base |
| Rubber matting over solid base | £20 to £45 per square metre for materials | Comfortable underfoot, reduces slips | Must not trap water beneath or impede drainage |
Prices vary with excavation, access, regional labour rates and the condition of the existing base. A small greenhouse base is often priced as a minimum job, so the cost per square metre can be higher than for a larger patio. For a typical 6 foot by 8 foot footprint, expect a professionally prepared concrete base to cost around £700 to £1,500 in many parts of the UK.
A central paved path with gravel or raised beds to either side is a proven layout. The path gives stable footing and the gravel allows water to drain. Avoid laying an impermeable surface with no route for water to escape. Condensation, spilled watering cans and hose use can leave the interior persistently damp.
Where a greenhouse is being installed as a domestic outbuilding, base work should not alter drainage routes towards the house or a neighbour’s boundary. If the garden has clay soil, standing water or a known drainage issue, seek advice before pouring a slab.
Bring in water without creating a damp, cluttered space
Most greenhouse failures are not caused by lack of watering, but by inconsistent watering. A water butt connected to a nearby shed or greenhouse gutter is one of the simplest improvements. Rainwater is generally preferred by many plants, particularly acid loving species, and a 200 litre water butt typically costs £40 to £100 before fittings.
Position the butt so that it does not obstruct the doorway or load against greenhouse glazing. A filled 200 litre butt weighs more than 200kg. It needs a level, stable base, preferably paving slabs or a purpose made stand on a firm foundation.
Capillary matting, drip irrigation and timer controlled systems can help during holidays, but they are not a substitute for checks during heatwaves. A basic gravity fed irrigation kit starts at around £30 to £70. More reliable systems connected to an outdoor tap, with a pressure regulator, filter and timer, commonly cost £80 to £250 for materials. A gardener or irrigation installer may charge £150 to £500 for a small installation.
Keep hoses tidy. A hose across a narrow central path is a trip hazard, especially where condensation has made the floor damp. Wall clips, a compact hose reel or a water point at bench height make daily use much safer.
Lighting, heating and electrical safety in a greenhouse
Supplementary lighting is useful for propagation and for extending the growing season, but it must be selected and installed for damp conditions. Standard indoor extension leads, multiway adapters and table lamps are not suitable for a humid greenhouse.
If you are adding a new electrical circuit from the house, the work may fall under Part P of the Building Regulations in England. Electrical work outdoors and in outbuildings should be designed, installed and tested by a competent electrician. Use a contractor registered with a recognised scheme, such as an NICEIC approved business, who can provide the appropriate certification.
As a guide, a new armoured cable supply to a nearby greenhouse or shed, including an RCD protected consumer unit and a small number of weatherproof sockets, may cost £500 to £1,500. Difficult cable routes, paving reinstatement, long distances or a consumer unit upgrade can raise this to £2,000 or more.
Choose exterior rated fittings with a suitable IP rating. IP44 may be appropriate for sheltered locations, but equipment exposed to direct water spray requires greater protection. Your electrician will assess the location, cable route, earthing arrangement and protective devices in line with BS 7671, the IET Wiring Regulations.
For most hobby greenhouses, a thermostatically controlled electric fan heater is safer and simpler than bottled gas heating. Expect to pay £35 to £150 for a basic greenhouse heater, with better insulated and thermostatically controlled models costing more. Running costs can be significant. A 2kW heater running continuously for 24 hours uses 48kWh, so frost protection should be carefully managed with insulation and a low temperature thermostat.
Never use a barbecue, charcoal burner or portable fuel appliance to heat a greenhouse. Carbon monoxide, fire and moisture risks are serious in an enclosed structure. Any fixed gas work must be completed by a Gas Safe registered engineer.
Use shading, ventilation and insulation together
A greenhouse can exceed 35 degrees Celsius on a sunny spring day, even while outdoor temperatures feel mild. Plants wilt rapidly if ventilation is inadequate. Roof vents should open freely, louvre vents should not be blocked by shelves, and doors should be opened on warm days where safe to do so.
Automatic vent openers cost around £25 to £60 and are worthwhile for many greenhouses. They use a wax cylinder that responds to temperature. They are not infallible, so check them at the beginning of each season and replace failed cylinders promptly.
Shade netting, blinds or greenhouse shading paint reduces scorching. Internal shade net is normally easier to fit and remove. For a small greenhouse, allow £20 to £80 for basic shade netting and fixings. Avoid permanent heavy shading over the entire greenhouse, as it can substantially reduce useful light during the UK winter.
Bubble insulation can reduce heat loss for overwintering plants. It should be fitted inside the frame with clips, keeping vents and gutters clear. Good quality horticultural bubble insulation costs around £25 to £80 for a small greenhouse. Remove or roll it back in spring, otherwise low light levels can make plants weak and leggy.
Air movement matters as much as ventilation. A small circulation fan helps reduce condensation and fungal disease, particularly around dense tomato foliage. Keep electrical equipment clear of direct drips and avoid placing it where water is likely to be spilled.
Add seating and character without losing growing room
A greenhouse should be practical first, but it can still feel inviting. One well chosen chair, a narrow folding bench or a small stool can create a place to stop and enjoy the garden. Folding furniture is particularly useful because it can be stored during peak growing periods.
Choose materials that tolerate moisture. Powder coated metal, treated timber, synthetic rattan and plastic are practical options. Ordinary upholstered furniture, untreated wicker and indoor rugs quickly become damp and mouldy.
For a greenhouse used as an occasional retreat, keep décor simple. Terracotta pots, labelled seed drawers, a small galvanised watering can and a few hanging herbs add character without becoming clutter. Avoid storing flammable materials, cardboard boxes or excessive timber in the greenhouse, particularly near heaters or electrical equipment.
If your greenhouse opens onto a patio or seating area, consider the wider garden layout. These Garden Seating Ideas can help you create a practical connection between the growing area and an outdoor place to sit.
For glazed spaces attached to the house, the design considerations are different because heat retention, ventilation and access into the home become more significant. See Conservatory Interior Ideas for ideas better suited to a conservatory.
Planning permission and building regulations for a greenhouse
Most modest domestic greenhouses are treated as outbuildings and can often be built without planning permission under permitted development rights. This depends on the property, location and the proposed structure. The greenhouse must be for purposes incidental to the enjoyment of the dwellinghouse, rather than a separate home or commercial business use.
There are limits on height, location, coverage and proximity to boundaries. In broad terms, outbuildings should not cover more than half the land around the original house, should not be positioned forward of the principal elevation, and have lower height limits near boundaries. Flats, listed buildings, properties in conservation areas and homes subject to planning conditions can have more restricted rights.
The Planning Portal guidance on outbuildings is a useful starting point, but it does not replace confirmation from your local planning authority where the site is unusual or restricted.
Small detached greenhouses are commonly exempt from Building Regulations, provided they meet the relevant exemption criteria. Larger structures, structures very close to boundaries, buildings with sleeping accommodation, and projects involving significant electrical or drainage work require more careful consideration. A greenhouse attached to the house is not automatically treated in the same way as a detached garden structure.
If a builder is constructing a base, installing glazing or making alterations near a boundary, ask them to confirm what is included. Good tradespeople will identify access issues, drainage requirements, ground conditions and whether there is a need to consult Building Control or the planning authority before work begins.
Common mistakes to avoid with greenhouse interiors
Installing too much staging
Maximum shelf space can seem sensible until you cannot reach the back of the bench or turn around with a watering can. Deep benches often create forgotten areas where pests and mould develop. Keep working surfaces no deeper than you can comfortably reach, usually 600mm or less from one side.
Using ordinary indoor furniture
Old kitchen units, bookcases and bedside tables are often repurposed in greenhouses. Most are made from chipboard or MDF and break down rapidly in damp conditions. Once swollen, they can become unstable and difficult to clean. Use exterior grade timber, metal, plastic or purpose made greenhouse furniture instead.
Blocking ventilation with shelves and plants
Roof vents and louvre panels must remain clear. A crowded greenhouse can hold humid air around foliage for long periods, increasing the risk of botrytis, mildew and other fungal issues. Prune lower leaves on tomatoes, remove dead material promptly and create open routes for air to move.
Overloading shelves and glazing bars
Terracotta pots, full watering cans and bags of compost should sit on the floor or on freestanding heavy duty benches. Do not hang heavy baskets from lightweight roof bars unless the manufacturer confirms the load capacity. A failed support can damage glazing and cause injury.
Ignoring the floor level and drainage
A greenhouse floor should not direct water towards the door threshold, the house or a neighbouring garden. Poorly laid slabs, an uneven base and blocked gutters can all produce persistent standing water. Sort drainage before adding interior finishes, not after.
Adding electrics as an afterthought
Extension leads through a window or under a door are not a long term solution. They are vulnerable to damage, moisture and overloading. If you know you will need lights, heating or an automatic irrigation system, include a proper electrical supply in the initial budget.
Practical greenhouse interior checklist
- Measure the internal width, ridge height, door opening and usable wall lengths before ordering furniture.
- Plan a clear central route of at least 600mm, wider where access needs require it.
- Place tall crops where they will not shade propagation benches.
- Use freestanding staging unless the greenhouse frame is rated for additional loading.
- Keep vents, gutters, door tracks and drainage channels accessible.
- Choose rot resistant, moisture tolerant materials for all furniture and storage.
- Provide a stable water butt base and a safe route for hoses.
- Use suitable weatherproof electrical fittings and a qualified electrician for fixed electrical work.
- Fit shading and automatic ventilation before the first hot spell.
- Leave enough floor space for cleaning, repotting and moving plants through the door.
Typical costs for a greenhouse interior upgrade
A simple refresh of an existing greenhouse can be achieved for £150 to £400 if you are buying basic staging, shelving, shade net and storage. A more complete interior with a new paved floor, bespoke timber benches, irrigation, lighting and an electrical supply can cost £1,500 to £5,000 or more.
Labour costs vary between regions and access conditions. A handyman may charge around £180 to £300 per day, while a carpenter, landscaper or electrician will commonly charge £250 to £450 per day. Small jobs may attract a minimum callout or half day rate.
Allow one day for basic staging and shelving installation. A new base can take two to four days including excavation, forming and curing time, although concrete should not be heavily loaded immediately. An electrical installation often takes one day for a straightforward nearby supply, but difficult trenching or consumer unit work can extend the programme.
Frequently asked questions
What is the best layout for a small greenhouse?
For a small 6 foot by 4 foot or 6 foot by 6 foot greenhouse, use one main bench along the sunniest long side, a narrow shelf on the opposite side and leave the centre clear. Put tall plants at the rear or in one corner, rather than across the middle. A folding potting shelf can provide extra workspace without permanently narrowing the path.
Keep the doorway area clear. This is often the best location for temporary trays because it is bright, but it becomes awkward quickly and restricts airflow.
Can I put electricity in my greenhouse?
Yes, but fixed electrical work should be designed and installed by a competent electrician. A proper outdoor cable, RCD protection, suitable earthing and weatherproof accessories are required. The installation should follow BS 7671. Avoid relying on indoor extension leads, particularly where there is condensation, watering and metal staging.
For a simple setup, one or two sockets and an LED light may be sufficient. If you intend to run a heater, propagator and irrigation timer together, ask the electrician to calculate the expected load before installation.
Do I need planning permission for a greenhouse in my garden?
Often no, provided it falls within permitted development rules for domestic outbuildings. However, the answer depends on the size, height, position, property type and local restrictions. Listed buildings, flats, conservation areas and newer estates with planning conditions need particular care.
Check the Planning Portal guidance and contact your local planning authority if there is any uncertainty. Getting written advice before ordering a large greenhouse is far cheaper than moving or dismantling it later.
How do I stop a greenhouse becoming too hot in summer?
Use roof vents, louvre vents, an open door where appropriate, automatic vent openers and internal shade netting. Watering paths and floors can temporarily increase humidity but should not be relied on as the main cooling method. A circulation fan can help move air through dense planting.
Keep plants away from hot glass, especially seedlings and soft foliage. Check temperatures during sunny weather in April and May, not only in mid summer. Greenhouses can overheat surprisingly early in the year.
Final Thoughts
The most successful greenhouse interior is not necessarily the one with the most shelves or the most decorative accessories. It is the one that gives you clear access, sensible storage, safe services and enough flexible space for plants to change through the seasons. Start with the floor, drainage and layout, then add staging, watering, ventilation and comfort features in that order.
If you need a greenhouse base, electrical supply, paving, timber staging or garden improvements, post a job on BookaBuilderUK to get free quotes from vetted local tradespeople.


