
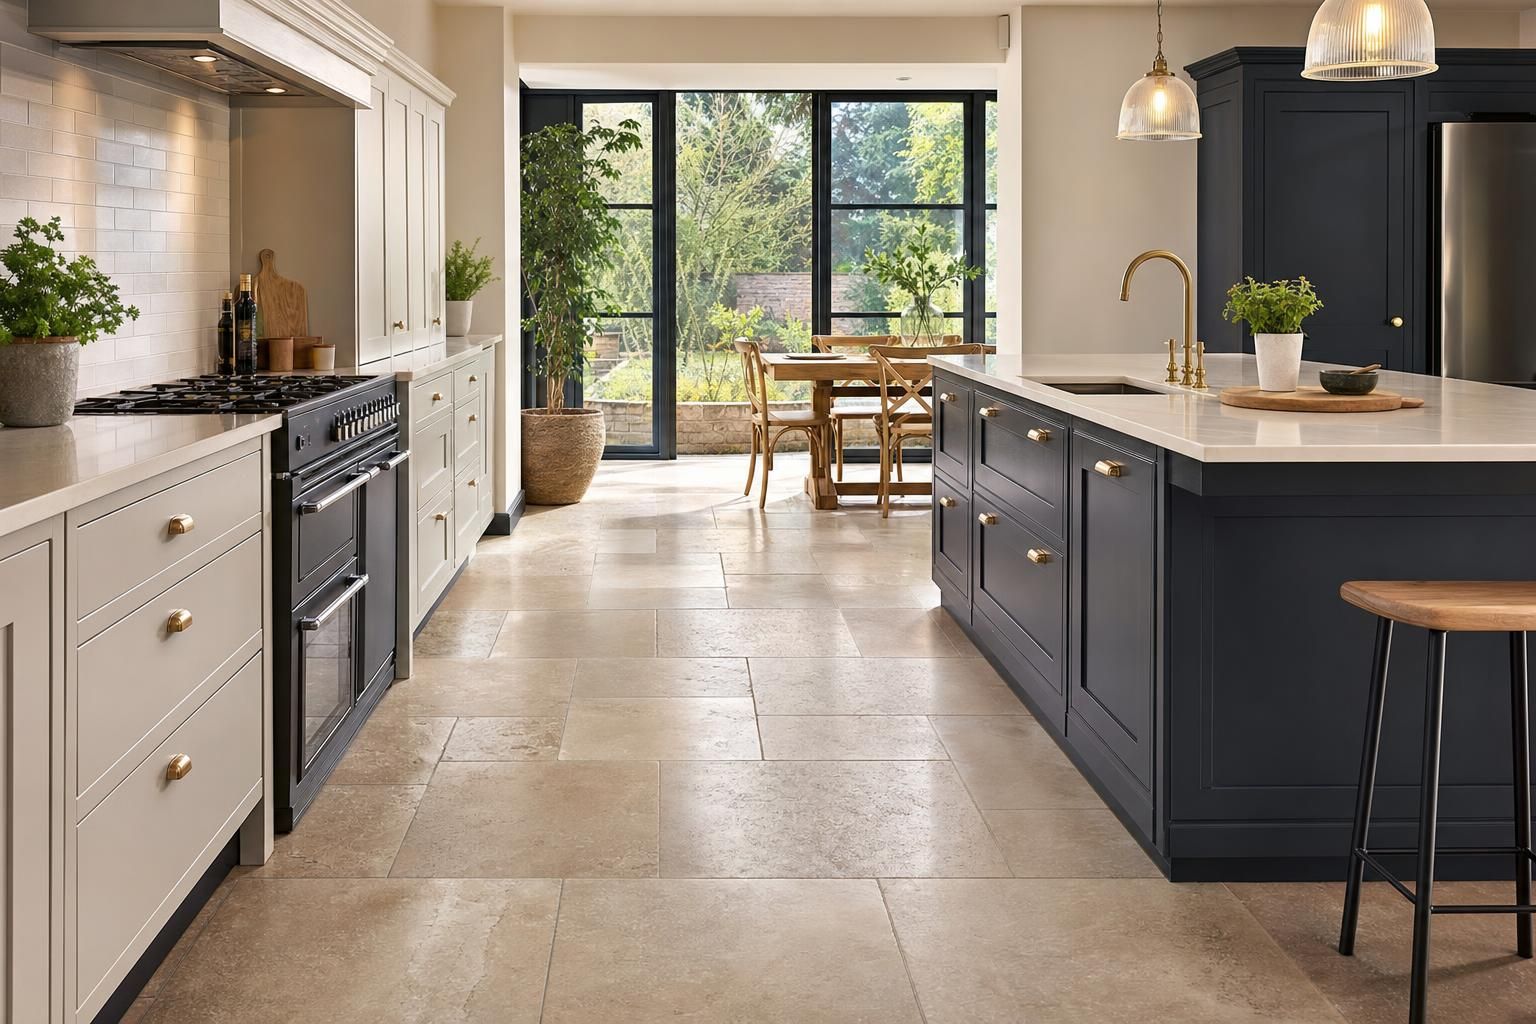
Kitchen Flooring Ideas
Kitchen flooring ideas are not just about style. In UK homes they need to stand up to moisture, heavy foot traffic, dropped pans and regular cleaning. Get the choice wrong and you will be dealing with lifting boards, cracked tiles or damp problems within a few years. Get it right and your floor will last decades while adding real value to your property.
This guide is written from a trades viewpoint, based on what actually performs well on site. You will find realistic costs, fitting considerations, and honest pros and cons of each option available in the UK market.
What Makes a Good Kitchen Floor in UK Homes
A kitchen floor has a tougher job than most surfaces in the house. It needs to handle water, heat, grease and constant movement without deteriorating. Period properties also bring uneven subfloors and limited insulation into the equation.
As a baseline, a good kitchen floor should be:
- Water resistant or waterproof
- Durable enough for daily traffic
- Compatible with underfloor heating if installed
- Easy to clean and maintain
- Stable on typical UK subfloors such as timber joists or concrete slabs
Before choosing a finish, you also need to understand what sits underneath. If you are unsure, read Choosing the Right Flooring Materials: A Professional’s Perspective, which explains how material choice impacts performance.
Comfort and noise also deserve consideration. Hard tile and stone can feel cold without heating and can make dropped crockery more likely to break. LVT, engineered wood and some laminates feel warmer and absorb more impact. In flats, impact noise may influence the product and underlay you can use.
Think about how the household uses the room. A busy family kitchen with pets, muddy footwear and frequent spills needs a forgiving, washable surface. A lightly used kitchen in a small flat may place more emphasis on appearance, reduced installation depth and quick fitting.
Slip Resistance in Kitchens
Kitchen floors can become slippery when contaminated with water, oil or cleaning residue. A glossy finish may look attractive in a showroom but perform differently beside a sink, dishwasher or external door.
Ask suppliers for recognised slip test information rather than relying on descriptions such as anti slip. In the UK, the pendulum test is widely used to assess slip potential. A pendulum test value of 36 or above is generally regarded as presenting a low slip potential in the tested condition. Results should state whether the surface was tested wet or dry.
Tile products may also carry an R rating. This comes from a ramp test and is often used to compare products, but it is not a direct substitute for a wet pendulum result. For a normal domestic kitchen, surface texture, grout layout and cleaning practice all affect real performance.
Very heavily textured floors can trap grease and become harder to clean. The best choice usually combines reliable wet grip with a surface that can be mopped properly. Households with young children, older residents or anyone with limited mobility should give wet slip performance particular priority.
Popular Kitchen Flooring Ideas in the UK
Luxury Vinyl Tile LVT
LVT has become one of the most popular kitchen flooring choices in the UK over the past decade. It replicates wood or stone visuals but performs far better in wet areas.
From a practical standpoint, it is:
- Fully waterproof
- Softer underfoot than tile
- Compatible with underfloor heating
- Available in glue down or click systems
Typical supply and fit costs range from £50 to £90 per square metre depending on brand and subfloor preparation. Premium brands such as Amtico and Karndean sit at the higher end.
The key to LVT is subfloor preparation. Any imperfections will show through. Many installs require self levelling compound, which adds £10 to £20 per square metre.
Glue down LVT is normally the better option around fitted kitchen units and in rooms with strong sunlight. It is stable, individual tiles can often be replaced, and there is less movement under appliances. Click LVT is quicker to install but needs the correct expansion clearance and must not be trapped beneath fixed cabinetry unless the manufacturer permits it.
Routine care is straightforward. Vacuum or sweep away grit, then use a damp mop and a cleaner approved for vinyl. Steam cleaners, abrasive pads and highly alkaline chemicals can damage the wear layer or joints. Furniture feet should have protective pads, especially beneath stools and tables that move regularly.
The wear layer matters as much as the pattern. For a busy household, a product with a robust commercial or heavy domestic wear classification is usually worth the extra cost. Cheap thin products can dent beneath appliance feet or show subfloor defects more readily.
Porcelain and Ceramic Tiles
Tiles remain a classic choice, especially in kitchens where durability is the main priority. Porcelain tiles in particular are extremely hard wearing and water resistant.
Advantages include:
- Exceptional durability
- Waterproof surface
- Wide range of finishes including stone effect and large format slabs
Costs typically fall between £60 and £120 per square metre installed. Large format tiles can push labour higher due to handling and levelling requirements.
You will need a solid subfloor. Timber floors often require cement backer boards before tiling to prevent movement and cracking.
Porcelain is denser and generally absorbs less water than standard ceramic. Ceramic can still work well in domestic kitchens, although it is more likely to chip if a heavy pan is dropped. Through coloured porcelain makes minor edge damage less visible than a tile with a contrasting body.
Tiles should be cleaned with a neutral cleaner. Grout needs particular attention because grease and dirt collect in the joints. An appropriate grout sealer can help where a porous cement based grout is used. Epoxy grout offers strong stain resistance but costs more and requires an experienced installer.
Cracked grout should not simply be covered with another layer. It can indicate movement underneath. Flexible adhesive and grout are commonly specified over prepared timber substrates and heated floors, but flexibility does not compensate for loose boards or excessive deflection.
Engineered Wood Flooring
Engineered wood offers a real wood surface with improved stability compared to solid boards. It works well in open plan kitchen dining spaces where continuity matters.
However, it is not fully waterproof. Spills need to be wiped quickly.
Typical costs:
- £70 to £130 per square metre fully installed
Avoid fitting in kitchens with frequent standing water or poor ventilation.
Check the thickness of the real wood wear layer before buying. A thicker wear layer may allow professional sanding in future, although the number of renovations will depend on board construction and damage around joints.
Use mats at external doors and absorbent protection near sinks, but avoid rubber backed products if the flooring manufacturer warns they may trap moisture or discolour the finish. Clean with a well wrung mop rather than soaking the boards. Recoat oiled timber as recommended, paying particular attention to worn routes between the cooker, sink and fridge.
Wood expands and contracts as indoor humidity changes. Correct perimeter gaps, suitable acclimatisation and stable room conditions reduce the risk of cupping or open joints. Leaking appliances can cause permanent staining even if the leak is discovered quickly.
Laminate Flooring
Laminate is often chosen for budget kitchen upgrades. It can look convincing but is less tolerant of water.
Modern water resistant laminates perform better than older products, but they still rely on tight joints and good installation.
Expect to pay £40 to £70 per square metre installed.
It is best suited to low risk kitchens or open plan areas away from sinks and appliances.
Choose a product specifically approved for kitchens. Some ranges have sealed edges and a stated period of resistance to surface water, but this does not make the floor safe from a dishwasher leak or moisture entering beneath the boards.
Do not wet mop laminate. Use a lightly damp cloth or mop and remove spills immediately. Damaged boards are difficult to repair invisibly, particularly if the original design is no longer available, so keeping a spare pack is sensible.
Underlay must match the flooring and substrate. An underlay that is too soft can place stress on click joints. On concrete, a suitable vapour control layer may be required, either separately or as part of the underlay system.
Natural Stone
Stone floors such as slate, limestone and travertine offer a premium finish. They are popular in period homes and high end renovations.
They do require:
- Sealing on installation
- Regular maintenance
- Professional fitting due to weight and variation
Costs typically start around £100 per square metre and can exceed £200 depending on material and labour.
Different stones need different care. Limestone and travertine are vulnerable to acidic products, including vinegar based cleaners. Slate can vary significantly in texture and thickness. Stone should normally be sealed before or during grouting, then resealed at intervals determined by use and the chosen sealer.
A simple water drop test can indicate when a porous stone is absorbing liquid more quickly, although the sealer manufacturer’s guidance should take priority. Use a neutral stone cleaner and remove grease promptly. Incorrect chemicals can etch the face or leave a cloudy film.
Natural variation is part of the appearance. A competent tiler will open several boxes and blend colours before fixing. Extra material should be allowed for selection, cutting and future repair. This allowance may be higher for heavily varied or irregular stone.
Kitchen Flooring Cost Comparison
| Flooring Type | Typical Cost per m² (Supply and Fit) | Water Resistance | Expected Lifespan |
|---|---|---|---|
| LVT | £50 to £90 | Excellent | 15 to 25 years |
| Porcelain Tile | £60 to £120 | Excellent | 25 plus years |
| Laminate | £40 to £70 | Moderate | 10 to 20 years |
| Engineered Wood | £70 to £130 | Moderate | 20 to 30 years |
| Natural Stone | £100 to £200 plus | Good with sealing | Lifetime with care |
For a deeper cost breakdown including labour factors, see How Much Does It Cost to Fit New Flooring in the UK in 2026? Carpet, LVT, Laminate and Engineered Wood Supply and Labour Compared.
Variables That Change the Final Price
Square metre rates are useful for comparison, but small kitchens can cost more per square metre because installers still have travel, setting out and minimum labour charges. Numerous doorways, islands and awkward cuts also slow the work.
Other cost variables include:
- The amount of old adhesive, tile or screed that must be removed
- Whether kitchen plinths, doors and appliances need alteration
- Moisture treatment or a surface damp proof membrane
- Repairs to joists, floorboards or concrete
- Floor height transitions into adjoining rooms
- Patterned layouts such as herringbone
- Premium trims, grout, adhesive and sealers
- Restricted access, parking costs and work in occupied homes
Removing ceramic tile is usually noisier, dustier and more labour intensive than lifting a floating laminate. Asbestos containing materials may exist in older floor tiles, adhesives or backing products. Suspect material should not be drilled, sanded or broken until it has been assessed by a competent surveyor and, where needed, sampled by an accredited laboratory.
Subfloor Preparation and Screeding
No kitchen floor will perform properly without a suitable base. Many failures blamed on flooring materials are actually due to poor subfloors.
Common subfloor types in UK kitchens:
- Concrete slabs in newer builds
- Suspended timber floors in older properties
- Existing tiles or vinyl that need removal
Uneven or damaged subfloors often require screeding. Options include traditional sand and cement or modern liquid screeds.
To understand which is appropriate, read Floor Screed Types Explained for UK Renovations Sand Cement, Liquid and Fast Drying Options Compared.
Costs typically range from £15 to £30 per square metre depending on depth and material.
Preparing Concrete Floors
Concrete must be sound, clean and free from laitance, curing compounds, paint, grease and weak adhesive residue. Preparation may involve mechanical grinding or controlled abrasion, followed by thorough vacuuming. Simply applying primer over contamination is not a reliable solution.
Cracks should be investigated before they are filled. A stable shrinkage crack may be repairable, while continuing movement can require specialist advice or a suitable decoupling approach. Raised areas usually need grinding because levelling compound is intended to fill low points, not disguise major high spots.
The primer, smoothing compound and flooring adhesive should form a compatible system. Mixing unrelated products can leave the installer without valid manufacturer support if bonding fails.
Preparing Suspended Timber Floors
Loose floorboards need to be secured without driving fixings into hidden pipes or cables. Damaged boards, weak joists and areas affected by rot must be repaired before an overlay is fitted.
Cement backer board can provide a stable tiling surface when installed to the board manufacturer’s specification. For resilient finishes, flooring grade plywood or an approved renovation system may be required. Thin decorative hardboard is not a substitute for structural preparation.
Suspended floors rely on ventilation beneath the joists. Air bricks should remain clear, and damp timber needs investigation rather than being sealed under an impermeable finish. In period homes, blocked ventilation, high external ground levels and leaking pipework are common causes of decay.
Subfloor Moisture Testing
A concrete floor can look dry while still holding enough moisture to damage adhesive, timber or resilient flooring. New slabs and screeds should be tested using a method recognised by the flooring and adhesive manufacturers.
For many resilient floor systems, a calibrated surface hygrometer is used to measure relative humidity at the subfloor. A reading of no more than 75 per cent relative humidity is commonly required under BS 8203 unless an approved moisture control system is specified. Product requirements vary, so the installer should record the readings and follow the relevant technical data.
Handheld electrical meters are useful for preliminary checks and identifying differences across a floor. They do not always provide sufficient evidence for final approval on concrete. Hygrometer hoods need time to reach equilibrium and should be positioned away from obvious local influences.
Wooden subfloors should also be checked with an appropriate moisture meter. Readings need to be considered alongside the property conditions and the moisture content of the new wood flooring. A large difference can lead to movement after installation.
If a concrete base lacks an effective damp proof membrane, a compatible surface damp proof membrane may be possible after suitable preparation. This should not be used to conceal an unresolved leak, penetrating damp or groundwater problem.
Screed Drying Times
Screed that is hard enough to walk on may still be too wet to cover. Traditional sand and cement screed is often allowed roughly one day per millimetre up to 40 millimetres, then about two days for each additional millimetre under favourable drying conditions. A 65 millimetre screed can therefore require far longer than two months.
Calcium sulphate liquid screeds commonly dry at about one millimetre per day up to 40 millimetres and more slowly beyond that, subject to product data, ventilation, temperature and humidity. Their surface laitance usually needs removal at the specified stage.
Fast drying and rapid strength products can shorten the programme, sometimes allowing coverings within days. The actual moisture limit, minimum thickness and commissioning process must come from the manufacturer. Calendar estimates do not replace testing.
Cold weather, closed windows and high indoor humidity delay drying. Direct intense heat can cause curling or cracking. Plan the programme around measured readiness rather than arranging the floor fitter immediately after screeding.
Underfloor Heating Considerations
Many kitchen renovations now include underfloor heating. Most modern flooring types are compatible, but installation must follow manufacturer guidelines.
In the UK, systems should comply with Part L of the Building Regulations covering energy efficiency. Guidance is available via Approved Document L.
Best performing options with underfloor heating:
- Porcelain tile due to thermal conductivity
- LVT designed for heated floors
- Engineered wood with correct thickness
Solid wood and thick laminates can reduce efficiency.
Tiles and stone transfer heat efficiently, although the insulation beneath the heating system has a major effect on running performance. Thick timber, unsuitable underlay and rugs add thermal resistance and slow heat delivery.
Many LVT, laminate and engineered wood manufacturers set a maximum floor surface temperature of 27 degrees Celsius. Some tiled systems can operate at different design temperatures, but controls, adhesives and the heating manufacturer’s limits still apply. The thermostat should use an appropriate floor sensor where the flooring specification requires one.
A newly installed heated screed must cure and dry before the heating is commissioned. Commissioning normally involves increasing the water or floor temperature gradually, holding it as directed, then reducing it before flooring installation. Switching immediately to full output can stress the screed and floor finish.
After the final floor is fitted, heating should remain off for the period required by the adhesive or flooring manufacturer. It can then be increased in small daily steps. Sudden temperature changes are especially risky for wood floors.
Electric systems require installation and electrical connection by a competent person. New circuits and electrical work in kitchens may be notifiable under Part P depending on the work involved. Water based systems need correct hydraulic design, zoning and controls rather than simply adding pipe to an existing radiator circuit.
Practical Installation Checklist
Before starting a kitchen flooring project, run through this checklist:
- Confirm subfloor condition and load bearing capacity
- Check moisture levels especially in concrete floors
- Allow materials to acclimatise as per manufacturer instructions
- Plan appliance removal and refitting
- Allow for door height adjustments after installation
- Ensure correct expansion gaps where required
- Confirm waste disposal arrangements
Skipping any of these steps leads to most of the issues tradespeople are later called back to fix.
Decide whether flooring will run beneath freestanding appliances and fixed kitchen units. Floating floors should not normally be trapped beneath rigid cabinetry unless the manufacturer expressly allows it. Glue down products and tiles are often installed across the complete room before units, but the project sequence and finished floor height must be agreed in advance.
Dishwashers and washing machines must still slide out for repair after the floor level rises. Check worktop clearance, appliance feet and service connections. Protect the completed floor while other trades finish decorating, plumbing and joinery.
Typical Installation Timeframes
A straightforward click laminate or click LVT floor in an empty 15 square metre kitchen may be fitted in one or two days once the base is ready. Removing appliances, trimming doors and dealing with multiple thresholds can add another day.
Glue down LVT usually needs more preparation. Allow a day for removal and base repairs, a day for smoothing compound to cure where specified, then one or two days for setting out and fitting. Detailed borders or herringbone layouts take longer.
A normal tiled kitchen often takes three to five working days for preparation, fixing, curing and grouting. Large format tile, natural stone and complicated patterns can require five to seven days or more. The room may not be ready for heavy appliances immediately after grouting.
These estimates exclude extended drying periods for new screed or moisture treatments. Structural timber repairs can also lengthen the work. Homeowners should arrange a temporary cooking area and confirm how long the sink, cooker and washing machine will be unavailable.
What Can Go Wrong
Even quality flooring can fail if installed poorly or used in the wrong setting.
Common problems seen on UK jobs include:
- LVT lifting due to insufficient adhesive or poor subfloor prep
- Tiles cracking from movement in timber floors
- Laminate swelling after water ingress
- Uneven finishes from rushed screeding
- Incorrect expansion gaps causing buckling
Many of these issues are preventable with proper planning and experienced installers.
The Health and Safety Executive provides general construction safety guidance which also applies to domestic projects, especially regarding manual handling and site hazards, see HSE Construction Guidance.
Another frequent issue is poor setting out. Narrow tile cuts along a visible wall, crooked wood patterns and badly aligned transitions can spoil an otherwise sound job. The installer should dry plan the layout and agree focal lines before adhesive is mixed.
Leaks also need early attention. Flooring should not be expected to act as a waterproof tank. Drip trays, accessible isolation valves and regular checks around appliance hoses can limit damage. Any swollen, hollow or discoloured area should be investigated before mould and subfloor deterioration spread.
How Much Does a Full Kitchen Floor Replacement Cost
A full kitchen floor replacement usually involves removal, preparation and installation.
Typical costs for a 15 square metre kitchen:
- Old floor removal and disposal, £200 to £500
- Subfloor repair or levelling, £300 to £800
- New flooring supply and fit, £750 to £1,800 depending on material
Total project costs often fall between £1,200 and £3,000 for standard kitchens. High end materials or structural work will increase this.
For more detail, see How Much Does It Cost to Replace a Kitchen Floor in 2026? LVT, Tile and Subfloor Repair Prices Explained.
Set aside a contingency where the old floor has not yet been lifted. Around 10 to 15 per cent is sensible for a straightforward renovation, while older properties may justify more. Hidden rotten boards, cracked screed and multiple layers of adhesive are difficult to price accurately from a visual survey alone.
Quotes should state whether VAT, disposal, trims, primers, levelling products, appliance handling and door trimming are included. Compare the preparation specification as well as the final flooring brand. A low quote that omits moisture testing or necessary smoothing may become expensive later.
Choosing the Right Option for Your Property
Different homes suit different flooring types.
In Victorian terraces with suspended timber floors, LVT or engineered wood tends to perform better due to slight movement in the structure.
In modern homes with concrete slabs, tiles or stone are often the most durable option.
Open plan layouts benefit from continuity, so many homeowners choose LVT or engineered wood to flow through spaces.
Rental properties often prioritise cost and durability, making mid range LVT a sensible choice.
Period Houses and Cottages
Older homes need a careful moisture and ventilation assessment. Covering a damp suspended floor with an impermeable finish can hide deterioration. Uneven walls and floors also make rigid large format products harder to set out neatly.
Natural stone can suit the character of a cottage, but the floor structure must support the weight. Engineered oak and stone effect LVT can provide a traditional appearance with less structural loading. Listed buildings may require consent for work that affects historic fabric, even though an ordinary floor replacement does not need planning permission.
Flats and Apartments
Check the lease before changing flooring in a flat. Some leases require carpeted areas or impose acoustic standards. Building control requirements concerning resistance to sound may apply where separating floors are altered as part of relevant building work.
Impact reducing underlay must be compatible with the chosen floor and should not create excessive movement at joints. Access restrictions, lift protection, parking and permitted working hours can also affect labour costs.
New Builds and Modern Extensions
New concrete and screed can retain construction moisture for months. Do not assume the floor is ready because the house appears finished. Recorded moisture testing is particularly valuable before installing timber or glue down LVT.
Porcelain performs well over a correctly designed slab and underfloor heating system. LVT offers a warmer feel and a lower build height where thresholds are tight. Confirm that any reported defects or settlement cracks are resolved before covering them.
Families, Pets and Accessibility Needs
Families often benefit from textured LVT or porcelain with verified wet slip performance. Mid tone patterns hide crumbs, pet hair and small scratches better than very dark, very pale or highly polished finishes.
For wheelchair users or people with restricted mobility, minimise raised thresholds and abrupt transitions. A continuous floor can reduce trip risks. Dense tile offers excellent rolling resistance, while deeply textured stone may make movement harder and collect dirt.
Pet owners should prioritise scratch resistance, grip and easy cleaning. Matte LVT and textured porcelain are practical choices. Claws may mark soft wood finishes, although local marks in an oiled wood floor can sometimes be repaired more easily than damage to laminate.
Maintenance Planning by Material
Good maintenance begins with preventing grit and moisture from spreading through the kitchen. Use an effective entrance mat, vacuum regularly and clean spills promptly. Avoid flooding any floor during mopping.
- LVT: Use a neutral vinyl cleaner and soft pads. Avoid steam and solvent based products. Replace damaged glue down tiles before moisture or dirt reaches the base.
- Porcelain and ceramic: Clean grout lines regularly and repair failed joints. Avoid wax products that can increase slip risk.
- Engineered wood: Keep indoor humidity reasonably stable, use minimal water and renew oil or lacquer according to wear and manufacturer guidance.
- Laminate: Keep joints dry, use a lightly damp mop and replace leaking appliance hoses quickly.
- Natural stone: Use pH neutral stone cleaner, avoid acidic chemicals and renew sealer when absorption increases.
Keep spare boards or tiles from the original batch. Colours and dimensions can change between production runs, so a future replacement from a new box may not match.
FAQs
What is the most durable kitchen flooring in the UK?
Porcelain tile is generally the most durable option. It resists scratches, moisture and heavy loads. LVT is a close second and often preferred for comfort and easier installation.
Is LVT better than laminate for kitchens?
Yes in most cases. LVT is waterproof and more stable. Laminate can be used if water resistant, but it remains more vulnerable to spills and leaks.
Do I need planning permission to replace a kitchen floor?
No, replacing flooring does not require planning permission. Building regulations may apply if you are adding underfloor heating or altering the structure. Always check compliance with current regulations.
How long does it take to fit a kitchen floor?
Most kitchen floors take 2 to 5 days including preparation. Complex jobs involving screeding or structural repairs can take longer, especially if drying time is required.
Can I install kitchen flooring myself?
Some materials like click LVT or laminate are DIY friendly. However, achieving a professional finish, particularly with tiles or glue down products, requires experience and proper tools.
Should flooring go beneath kitchen units?
It depends on the flooring system and project order. Tiles and fully bonded finishes are often laid beneath units. Floating laminate, engineered wood and click LVT should not usually be trapped beneath fixed cabinets unless the flooring manufacturer approves that arrangement.
How soon can appliances go back after fitting?
Click floors can often accept appliances once installation is complete, provided the surface is protected during movement. Adhesive fixed floors, grout and smoothing compounds need their stated curing time. This may range from several hours to several days depending on the products and site temperature.
Does waterproof flooring prevent damage from leaks?
A waterproof floor covering resists water passing through its surface, but water can still enter at perimeters, service penetrations and damaged joints. It may then become trapped beneath the finish. Appliance leaks should always be repaired and the subfloor checked.
Final Thoughts
The best kitchen flooring balances durability, practicality and appearance. Cutting corners on preparation or installation usually leads to early failure and extra cost later. Investing in the right material and a skilled installer makes a noticeable difference over time.
If you are planning a kitchen upgrade, the easiest way to get started is to post a job on BookaBuilderUK and receive free quotes from vetted local tradespeople.


